Marks asp.net / mvc blog

Web developer from Sydney Australia. Currently using asp.net, mvc where possible.

Tuesday, July 24, 2012

NuGet Package Restore with a Local Repository and Offline Access

NuGet package restore is a great feature as it means you no longer need to check in packages to source control. The only downside is that you need to have a internet connection to "restore" the packages.

This post is going to help address that issue by showing how you can keep your downloaded NuGet packages in a central location to save space and provide offline access.

Warning: this works for me but it isn't a supported use case, so YMMV + use at your own risk.

Firstly, enable NuGet package restore on your solution

To enable package restore (make sure you have the NuGet.2.0 extension installed) simply right click on your solution and select "Enable NuGet Package Restore"

Once this is done any packages missing from your packages folder will be automatically downloaded when you build the solution. Try it out.., delete any folder under the "packages" directory and rebuild the solution. NuGet will automatically download the missing packages.

Next, Set up a central package repository

Now to minimize the number of items we need to download (and disk space) we are going to configure NuGet to use a single location for the packages. Normally NuGet will store the packages in a "packages" folder at the solution level but this means there is a lot of duplication of files. I have setup a global location for my packages at  "C:\ddrive\dev\_nuget_repository\packages" but this can vary between computers as it's based on an environment variable.

To do this, first create an environment variable called PackagesDir 
Next modify the "NuGet.targets" (this file is added to your solution in the first step) and add the attribute: Condition=" '$(PackagesDir)' == '' "  to the two lines, as shown below (NuGet.targets):
NB: Commit all the files under the .nuget folder to source control.
You might need to restart visual studio but now you should have your packages stored in your preferred central location.

Finally, Lets set up our own NuGet feed based on the packages in this central repository.

Notice how I set a extra "packages" directory to my location. This is because the packages directory will hold all the extracted packages created by NuGet and visual studio. We will  use the parent directory as the NuGet Feed directory.

This relies on a powershell script to copy the .nupkg (zipped packages) which exist in the sub directories up to the parent ( in my case its: C:\ddrive\dev\_nuget_repository\).

Save the following power shell command to a file called "_PackageCopier.ps1" into the _nuget_repository directory :
"" "Package Copier Starting..........." "" if($args.length -ne 2) { $source = resolve-path "..\..\packages" $destination = resolve-path "..\..\_nuget_repository\" } else { $source = $args[0] $destination = $args[1] } if( -not (Test-Path -PathType Container $source)) { throw "source directory does not exist, source: " + $source } if( -not (Test-Path -PathType Container $destination)) { throw "Destination directory does not exist!! " + $destination } Get-ChildItem -Recurse -Filter "*.nupkg" $source ` | Where-Object { -not( Test-Path -PathType Leaf (Join-Path $destination $_.Name)) } ` | Copy-Item -Destination $destination -Verbose `
Now save the following bat file into the same directory (called "_update_from_repository.bat" ):
powershell.exe .\_PackageCopier.ps1 "packages" "." pause
If you are errors running powershell see stackoverflow. Basically I have set my execution policy to unrestricted for both 32bit and 64bit powershell prompts.

Now when you double click the _update_from_repository.bat your local NuGet repository will be updated with all the NuGets you are using from all your solutions.

Setup the local repository in Visual Studio:


That's it. You should now have a central repository for all NuGet packages and the a local repository of all the packages you have used.

If would be great if the NuGet.targets file could be modified permanently globally to respect an environment variable!


Below is a screen grab of what my _nuget_repository directory looks like:


kick it on DotNetKicks.com      Shout it

Sunday, September 25, 2011

Project to File Reference Switcher for Visual Studio

Switching from project to file references in visual studio has always been a pain. Once you add a project to the solution you have to go find all the locations the assembly is referenced by file path and remove and update to a project reference.

On top of playing hide and seek with references, the actual act of changing references is a slow and painful experience.

So I decided to experiment and write my first visual studio extension, "Reference Switcher"

Once installed it will sit patiently in the background and only activate when you add or remove a project from the solution.

When you add a project, it gets the assembly name defined by the project and then checks to see if other projects in the solution are referencing that assembly name. If they do, it will open a alert box (sorry, send a push request) and ask if you would like to switch the file reference to a project reference. Just hit OK and it will go ahead and switch all the references for you.

When you remove a project, it all happens in reverse. So any project references that it changed are restored back to the original file based reference.

Here are some screen shots of the extension in action:

1) Adding a existing project (existing projects have a file references to this one)


2) Shows projects that can be updated to use a project reference


3) Now the references have changed to Project References


4) When the project is removed, Reference Switcher confirms before changing the references back to there original location


5)Now the reference has changed back to a file reference


That's all there is to it. Small & simply but very handy.

The extension source can be found on git hub here:
Extension can be found in the gallery here:

Shout it

kick it on DotNetKicks.com

Friday, November 19, 2010

Installing Ruby on Rails 3.0.3 on Ubuntu on Virtual Box on Windows 7

WARNING: This is how I got things working, it may not be the best way and it may not work for you!

For a while now I have been wanting to try out ruby and rails (and Python + Django and php). Why? well I want to call myself a web developer and not a asp.net mvc developer. It’s just about keeping up on how the rest of the world is developing web applications. So I am going to make a real effort to learn other frameworks, starting with rails.

Pretty much every rails guide out there says at some point ‘Don’t use windows’ as your OS.
Having done a tiny bit of Unix programming in the past I already understood that using windows won’t give your the full ruby on rails experience. The command line on Linux/Unix systems is just that much better then what windows provides and ruby on rails makes full use of it. There are other benefits as well such as: ruby running faster, better support from the community (more people using Linux environments), more open source tools, experience using Linux (which comes in handy when you host on Linux) . NB: Mac's use a Linux based OS.

Getting the environment setup was something of a challenge (to say the least). Given I already have basic Linux skills, the setup could be a complete show stopper for people who have only used windows for development. This post is so I can quickly and easily get it up and running in the future and in the process hopefully help one or two other people along the way.

1) Getting an Ubuntu ISO

You can download the Ubuntu Desktop Edition ISO from the Ubuntu download page. It’s around the 700Mb mark. If your running a 32bit OS then make sure you download the 32 bit version. If your unsure download the 32bit version.

Just save it to disk somewhere you can find it, once we have VirtualBox up and running it will mount the ISO image directly as a CD-ROM drive on your virtual machine.

2) VirtualBox

Although there are many choices out there for running virtual machines I choose Virtual Box based on previous good experiences using the product. It’s also available free of charge for personal use.
The install is just a click through wizard on windows.
Once VirtualBox is running click the New icon to make a new virtual machine. Make sure you select ‘Linux’ as the operation system and Ubuntu as the version (select Ubuntu 64 bit if downloaded the 64 bit ISO).

new-virutal-machine

For starters allocate around the 1.5 gig mark for memory (you can change this at any point and assuming you have at least 4 gig on the host).

For the virtual hard disk I just left the settings as default (“Create new hard disk”) and creating a new Dynamically expanding storage drive. But feel free to tinker this as your see fit.

Once your new machine has been created you can select it and click the settings button. Then select storage and set the Ubuntu ISO as the source for the CDROM drive as show below.

set-ubuntu-iso-as-cdrom-drive

3) Ubuntu

Now we have our virtual machine setup and a installation disk mounted we can fire up our new virtual machine by double clicking it inside VirtualBox. After some time you should see the Ubuntu Install screen.

ubuntu-install-screen

Just make sure you select “Install Ubuntu 10.XX LTS” because we are running at virtual machine and we want it to install onto our virtual hard drive.

From here on its a really easy (glad to say) wizard similar to the windows installation wizard. Just keep clicking next unless something catches your eye (like incorrect region or such). Make sure you remember the password you create for your account!

After the installation completes we can prepare Ubuntu for our rails installation.

Assuming you have remembered your password, you should be able to login. Don’t worry about any aesthetics, small window size or anything else yet just get rails working first.

If you new to Linux and the terminal you may want to Google-up on that and find some nice introduction articles to get you up to speed. Here is a terminal introduction from the Ubuntu documentation.

First open a terminal window (under Applications –> Accessories –> Terminal) and run the following command to update any existing software packages.
sudo apt-get update
Explanation:
  • sudo: means run the next command as root (or Administrator level)
  • apt-get: is the Ubuntu package manager, it downloads and installs software for you.
  • update: just tells apt-get to update all existing packages.
Now lets install some more packages, I have just followed the advice from this page: http://thekindofme.wordpress.com/2010/10/24/rails-3-on-ubuntu-10-10-with-rvm-passenger-and-nginx/. To be specific: the command suggested by the commenter at the bottom. This post was a great help in getting my installation working.

Inside the terminal run the following command:
sudo apt-get install build-essential bison openssl libreadline5 libreadline5-dev curl git-core zlib1g zlib1g-dev libssl-dev libsqlite3-0 libsqlite3-dev sqlite3 libxml2-dev libmysqlclient-dev
Once this is complete we are ready to move onto ruby and rails using RVM.

4) Ruby on Rails 3.0.3

For our ruby installation we are going to use RVM (Ruby Version Manager). RVM is awesome and it can really take a lot of the pain out of getting rails up and running. RVM is also a powerful tool for managing GEMS, it gives you a single command to managing the version of ruby you are using and the GEMs you are using.

Installing RVM is not straight forward (don’t be fooled by the Quick Install) on the home page. Start by running the command below (as suggested).
bash < <( curl http://rvm.beginrescueend.com/releases/rvm-install-head )
Then follow the link to the Installing RVM page and follow the Post Install instructions carefully.

Use the command below to fire up gedit so you can edit your .bashrc file and add the line as instructed:
gedit .bashrc
Now add this line to the BOTTOM of the file
[[ -s "$HOME/.rvm/scripts/rvm" ]] && . "$HOME/.rvm/scripts/rvm" # This loads RVM into a shell session.
Now follow the Troubleshooting your install section and read the notes about the return statement. It basically says replace:
[ -z "$PS1" ] && return
with:
if [[ -n "$PS1" ]]; then
and indent EVERYTHING below until just before the line you have just added. I simply held ctrl-shift and pressed End to select the remaining content of the file, then pressed TAB to indent. Then inserted the closing:
fi

[[ -s "$HOME/.rvm/scripts/rvm" ]] && . "$HOME/.rvm/scripts/rvm"  # This loads RVM into a shell session.
Save and close gedit. Close your terminal window and open a new terminal window then type:
rvm
Which should result in the usage information for rvm being shown. Now we can proceed to install ruby version 1.9.2.
rvm install 1.9.2
Once this has installed successfully we need to set 1.9.2 as our default ruby installation. (NB: to be safe you might want to restart your terminal here)
rvm use 1.9.2 --default
We can check this worked by asking ruby it’s version:
ruby -v
Assuming this worked and said something about ruby 1.9.2 we can finally install rails.
rvm 1.9.2@global
gem install rails
The first command sets the gemset (think of it as like a namespace for gems) to the global gemset. We want to install rails into the global gemset, this means all other gemsets (that we may create) will have access to the rails gem (+ dependencies).

Once rails has installed, lets create a new rails app and to be super unoriginal we call it MyBlog.
mkdir sites 
cd sites 
rails new MyBlog 
cd MyBlog 
bundle install
So what we did here is:
  • Create a new directory for called sites
  • Changed to the sites directory
  • Created a new rails app called MyBlog
  • Change to the MyBlog directory (created by rails)
  • Called Bundler to install any necessary gems for our new project (sqllite was missing)
Now we can fire up the rails server
rails server
If you read the output you will see the port that the web server is running. So its just a matter of opening your browser to that address.

OK, that's it for now. If you read this far I really hope you managed to get rails up and running on a virtual Ubuntu machine! Proof below….

rails-running

5) VirtualBox Additions

If rails is up and running chances are you want to improve your working environment. The first step is to install the VirtualBox Additions, here is a good article detailing the process.

Otherwise, Ubuntu is fully customisable but don't waste time trying to make it look like a mac :)

Monday, October 25, 2010

Unit Testing – MsBuild Series

This post is going to walk through the steps of adding unit testing to our build script. This post is assuming that you already have a MsBuild script setup that you can run from the command line. Otherwise you might want to look at my previous post on setting up a build file for Visual Studio:

1) Change the output path for Test projects

The first thing to do is to change the output path for the test project (or projects). We do this so that the testing binaries to are separated from the release binaries. Below is a screen shot of the directory being changed inside visual studio.

Change output Directory For Test Projects

Things to note:

2) NUnit Target

For running our tests I am going to use the “MsBuld.Community.Tasks” NUnit Task. We have been using other Tasks from the “MsBuld.Community.Tasks” so we already have the targets and dll that are needed for these tasks (see this post for details on getting the Community Tasks setup).

So, now we just define our NUnit target as follows:
<Target Name="NUnit">
    <ItemGroup>
        <TestAssembly Include="$(BuildOutputDir)\Test\*.test.dll" />
    </ItemGroup>
    <Message Text="NUnit is running on: @(TestAssembly)" />
    <Nunit ToolPath=".\Tools\NUnit" Assemblies="@(TestAssembly)" />
</Target>

<Target Name="Test" DependsOnTargets="NUnit">
    <Message Text="Testing code" />
</Target>

Things to note:
  • I have created two targets “Test” & “NUnit” which is not necessary if your only using NUnit. However, I did this so that it's easy to add other targets for different testing frameworks such as MbUnit, xUnit, Mspec etc. (if you using multiple test frameworks make sure you checkout gallio)
  • The TestAssembly ItemGroup will grab any assembly that ends with Test. 
  • The nunit console runner and lib directory have been copied to "[Project Dir]\Tools\NUnit"

The necessary nunit binaries have been copied into “[Project Root]\Tools\Nunit”. Normally I just copy “nunit-console.exe” , “nunit-console.exe.config” and the entire Lib directory.

3) Incorporate the Test target into the main build file

We now have the Test target so we all we need to do is have our default build target depend on our Test target, as follows:
<Target Name="Build" DependsOnTargets="Clean; VersionSolutionInfo; Compile; Test; Zip-Source; Zip-Binaries; NuPack">
<Message Text="Clean, VersionSolutionInfo, Compile, Test, Zip-Source, Zip-Binaries, NuPack"/>
</Target>
Now when we run our build the code is tested before creating our zips or NuPack (or should I say Nuget).

Testing Code

NB: Please check the reference files for full copies of the build targets used in this series so far

Resources:

This is the fifth post in the MsBuild series.

Shout it kick it on DotNetKicks.com

Thursday, October 21, 2010

Creating a NuPack package using a Build File - MsBuild Series

This post is going to walk through the steps of creating a NuPack package as part of an automated build file.
Previously we have created an automated build file to clean, version, compile, zip-binaries and zip-source code.
If you’re now familiar with creating build files then you may want to catch up by reading these:

1) NuPack Package Preparation

Before we start we need to get a few things in place.
  1. We need the NuPack.exe utility
  2. We need a directory to keep our NuPack stuff.
  3. We need a NuPack manifest file
(NB: The best way to learn how to build nuspec packages (at the moment) is to look through the examples by downloading the codeplex repository here: http://nupackpackages.codeplex.com/SourceControl/list/changesets)

Firstly we need to add the NuPack.exe utility to our tools directory. The NuPack.exe will be used to create our NuPack package. You can download this file from: http://nupack.codeplex.com/releases/view/52016
After downloading the following path should be valid:
  • [project root]\tools\nupack\nupack.exe
Next, we will create a directory for holding the input files for the NuPack package. Create the following directory:
  • [project root]\NuPack\
Inside this directory create a [projectName].nuspec file, for example:
  • [project root]\NuPack\StickyBeak.nuspec
This file needs to conform to the nuspec file format found here: http://nupack.codeplex.com/documentation?title=Nuspec%20Format
Below is a sample for the StickyBeak project:
<?xml version="1.0" encoding="utf-8"?>
<package>
    <metadata>
        <id>StickyBeak</id>
        <version>1.0.0.0</version>
        <authors>
            <author>Mark Kemper</author>
             <author>Jobping</author> 
        </authors>
        <description>StickyBeak is a logging utility for asp.net websites which can log every request to your site. It provides similar features as IIS log files but provides additional logging information (which just isn’t possible with IIS logs) and easy viewing of logs via a admin page</description>
        <language>en-US</language>
    </metadata>
</package>
Notice for now that we have hard coded the version number, later as part of the build we will replace this version number with the real version number.

Next I needed to copy some static files under the NuPack Directory. For StickyBeak I created the follow static content transforms
  • [Project Root]\NuPack\Content\NLog.config.transform”
  • [Project Root]\NuPack\Content\Web.Config.transform”
Any files you place in the Content directory will be copied to the target directory when someone installs your package.

Once you have your NuPack directory setup just how you want it, its time to build the package using a build target.

2) NuPack Target

For building the NuPack package I followed these basic steps it the build
  1. Copy everything from our “[Project Root]\NuPack” directory into “[Project Root]\Build\NuPack” . This sets up the static content required for the NuPack package.
  2. Copy the freshly built binaries from our output directory into “[Project Root]\Build\NuPack\Lib” – these files will become references when someone installs our package.
  3. Update the version number inside the Package specification file using a FileUpdate (regex) task
  4. Use a exec task to call the NuPack.exe executable and perform the packaging. NB: I set the working directory so the package will be created in the correct location.
The NuPack target is quite involved at the moment but hopefully dedicated task is created by Microsoft to help make this a little easier in the future.

The full target is shown below:
<Target Name="NuPack">
<PropertyGroup>
        <NuPackDestDir>$(BuildOutputDir)\NuPack</NuPackDestDir>
     <NuPackDestSource>NuPack</NuPackDestSource>
</PropertyGroup>
    <ItemGroup>
        <NuPackFiles Include="$(NuPackDestSource)\**" />
     <NuPackLibFiles Include="$(BuildOutputDir)\Bin\**" />
     <NuPackPackageFile Include="StickyBeak*nupkg" />
</ItemGroup>

    <Message Text="Setting up the $(NuPackDestDir) directory will all the necessary files to create our package"/>
    <Copy SourceFiles="@(NuPackFiles)"  DestinationFiles="@(NuPackFiles->'$(NuPackDestDir)\%(RecursiveDir)%(Filename)%(Extension)')" />
    <Copy SourceFiles="@(NuPackLibFiles)"  DestinationFiles="@(NuPackLibFiles->'$(NuPackDestDir)\Lib\%(RecursiveDir)%(Filename)%(Extension)')" />

    <FileUpdate Files="$(NuPackDestDir)\StickyBeak.nuspec"
 Regex="version>([^<]*)</version"
   ReplacementText="version>$(Major).$(Minor).$(Build).$(Revision)</version" />

    <Message Text="Executing the NuPack.exe packager"/>
    <Exec WorkingDirectory="$(BuildOutputDir)" Command="..\Tools\NuPack\NuPack.exe ..\$(NuPackDestDir)\StickyBeak.nuspec"/>
</Target>

3) Update Our Default Build

Now we can update default build task to create our NuSpec package after each successful build.
<Target Name="Build" DependsOnTargets="Clean; VersionSolutionInfo; Compile; Zip-Source; Zip-Binaries; NuPack">
<Message Text="Clean, VersionSolutionInfo, Compile, Zip-Source, Zip-Binaries, 
NuPack
"/>
</Target>
That's it. We can now prepare our NuSpec package a the click of a button. The results of our build directory now look like this:


Resources:


This is the forth post in the MsBuild series.

Shout it kick it on DotNetKicks.com

Wednesday, October 20, 2010

Zipping Build Outputs using a Build File - MsBuld Series

We are continuing ths msbuild series, this post will focus on zipping the outputs of the build. To recap so far we have setup a batch file that can build and version our project. The output of this build is placed inside a folder called "build" at the top of projects directory structure.

We will zip up the outputs of the build so they can be easily distributed. To do this, the Zip build task that is part of the “MsBuld.Community.Tasks” library will be used. If you are not familiar with this library and how to setup then please read through my two previous posts to get up to speed.
We are going to create two zip files during our build:
  1. A zip of all binaries needed to run the application
  2. A zip of all source code needed to compile the application.
We are zipping up the source so we can provide an easy download of the source code for our application via codeplex, github etc. Similarly we can provide just a zip of the binaries for a specific version of our application.

1) Change the output directory to “build\bin”

Firstly we are going to change our build output directory inside visual studio so that the binaries are placed into a new folder called bin under the build directory “[project]\Build\Bin”. Having a sub directory removes the clutter from the root of our build directory so we can place our zip files there.

Below is the screen shot of the new location being set inside visual studio for our automated_build configuration.

Changing the output directory

2) Creating the Zip-Binaries target

We have already included the “MSBuild.Community.Tasks” targets in our build file, so only thing we need to do before using the zip task is to ensure that we have copied the ICSharpCode.SharpZipLib.dll binary into our “Tools\MsBuildCommunityTasks” directory. This binary is included in the MsBuildCommunityTasks download.

Now declare the Zip-Binaries target as follows
<Target Name="Zip-Binaries">
<ItemGroup>
<BinDirectoryFiles Include="$(BuildOutputDir)\bin\**" />
</ItemGroup>
<Zip Files="@(BinDirectoryFiles)" WorkingDirectory="$(BuildOutputDir)\bin\"
ZipFileName=".\$(BuildOutputDir)\Jobping.StickyBeak_Binaries_$(Major).$(Minor).$(Build).$(Revision).zip" />
</Target>
Notes on the Zip-Binaries target
  • BinDirectoryFiles – this variable references all files below the "build\bin” directory. These are the files that we will zip.
  • The WorkingDirectory attribute for the zip task specifies the root directory for the zip file. We speicify the “build\bin” directory as the root for our zip
  • We use the version information to name the resultant zip file.

2) Creating the Zip-Source target

Apart from the binaries we also want to distribute the source code. So, we are going to declare a Zip-Source target for our build file as follows:
<Target Name="Zip-Source">
<ItemGroup>
<SourceFilesExclude Include="**\.hg\**" />
<SourceFilesExclude Include="build**" />
<SourceFilesExclude Include="**\.*" />
<SourceFilesExclude Include="**\bin\**" />
<SourceFilesExclude Include="**\obj\**" />
<SourceFilesExclude Include="**\Test\**" />
<SourceFilesExclude Include="**\TestResults\**" />
<SourceFilesExclude Include="**\*.user" />
<SourceFilesExclude Include="**\*.suo" />
<SourceFilesExclude Include="**\*.cache" />
<SourceFilesExclude Include="**\*.vsmdi" />
<SourceFilesExclude Include="**\*.testsettings" />
</ItemGroup>
<ItemGroup>
<SourceFiles Include="**\*.*" Exclude="@(SourceFilesExclude)" />
</ItemGroup>
<Zip Files="@(SourceFiles)" 
ZipFileName=".\$(BuildOutputDir)\Jobping.StickyBeak_Source_$(Major).$(Minor).$(Build).$(Revision).zip" />
</Target>
Notes on the Zip-Source target
  • We generally want to zip up everything, so we include all files by using the wildcard “**\*.*” which means all files in all directories.
  • We specify a list of excludsions, these are source control files and other files that are generated or not necessary in order to build our application.
  • Getting the exclude list correct requires some testing, you should test your source zip by extracting it and making sure you can compile the solution.

3) Incorporating the Zip tasks into our default build

Since we can now created the two zip targets all we need to do is have our default build target depend on these targets, as follows:
<Target Name="Build" DependsOnTargets="Clean; VersionSolutionInfo; Compile; Zip-Source; Zip-Binaries">
<Message Text="Clean, VersionSolutionInfo, Compile, Zip-Source, Zip-Binaries"/>
</Target>
That’s it. Below is a screen shot of the kicking off a build and the resultant output in the build directory.

Build output

Screen shot of our ready to ship zips:

Build output directory

Resources:
This is the third post in the MsBuild series.

Shout it kick it on DotNetKicks.com

Tuesday, October 19, 2010

Mercurial Revision No to Version your AssemblyInfo - MsBuild Series

By now you already have a build file setup and running, if not please see my previous post.

This post is going to focus on getting our version number automatically updated during the build process. We are going to use the AssemblyInfo task from the “MSBuild.Community.Tasks” library and the HgVersion task from the “MSBuild.Mercurial library.

The HgVersion task will get the revision number from our Mercurial source control repository so we can include it in our assemblyInfo file.

The AssemblyInfo task will create our AssemblyInfo file before the compile task is executed.

If you are using TFS or Subversion you will need to substitute the Mercurial task for the equivalent task for these version control systems. The MsBuild.Community.Tasks contains a TFS and Subversion Version tasks for this purpose.

1) Getting the revision number from Mercurial.

Firstly download and copy the MSBuild.Mercurial from http://msbuildhg.codeplex.com/releases/view/47779 and copy the following two files below to “[Project Root]\Tools\MSBuild.Mercurial” diretory:
  • MSBuild.Mercurial.dll
  • MSBuild.Mercurial.tasks
With these files in place we can now use the HgVersion Task to retrieve the version number from Hg and store it into a property.
<PropertyGroup>
    <MSBuildMercurialPath>.</MSBuildMercurialPath>
</PropertyGroup>
<Import Project="Tools\MSBuild.Mercurial\MSBuild.Mercurial.Tasks" />
<Target Name="Hg-Revision">
    <HgVersion LocalPath="$(MSBuildProjectDirectory)" Timeout="5000">
        <Output TaskParameter="Revision" PropertyName="Revision" />
    </HgVersion>
    <Message Text="Last revision from HG: $(Revision)"/>
</Target>
Firstly we set “MsBuildMercurialPath” to the current directory. Then we import the Mercurial Tasks from our Tools directory.

Next we define a new target called “Hg-Revision” which calls the HgVersion task. The HgVersion task will set the revision number from the repository in the "LocalPath" to a property called “Revision”.

Lets test it out by running: build /t:hg-revision

Output from hg-revision task

2) Creating our Assembly Info File

Now we are going to create a task to automatically generate an assembly info file.

We need the MSBuild.Community.Tasks library from here: http://msbuildtasks.tigris.org/

Again I will copy the necessary files under the tools folder.
  • Tools\MSBuildCommunityTasks\MSBuild.Community.Tasks
  • Tools\MSBuildCommunityTasks\MSBuild.Community.Tasks.dll
(NB: Copying these assemblies under tools folder makes the solution much easier to setup on other developer machines and build servers.)
<!-- Create an Assembly Info File -->
<PropertyGroup>
    <Major>1</Major>
    <Minor>0</Minor>
    <Build>0</Build>
    <Revision>0</Revision>
    <MSBuildCommunityTasksPath>.</MSBuildCommunityTasksPath>
</PropertyGroup>

<Import Project=".\Tools\MSBuildCommunityTasks\MSBuild.Community.Tasks.Targets" />

<Target Name="SolutionInfo">
    <Message Text="Creating Version File: $(Major).$(Minor).$(Build).$(Revision)"/>
    <AssemblyInfo
        CodeLanguage="CS"
        OutputFile=".\Source\SolutionInfo.cs"
        AssemblyTitle="Jobping.StickyBseak"
        AssemblyDescription="StickyBeak logs requests to your website"
        AssemblyCompany="http://www.jobping.com/"
        AssemblyProduct="Jobping.StickyBeak"
        AssemblyCopyright="Copyright © whohive"    
        ComVisible="false"
        CLSCompliant="true"
        Guid="1d4d1a0d-52f3-49d4-b2f8-3ca642f05cfe"
        AssemblyVersion="$(Major).$(Minor).$(Build).$(Revision)"
        AssemblyFileVersion="$(Major).$(Minor).$(Build).$(Revision)"
    />
</Target> 
Once this is in place we can now generate our AssemblyInfo.cs file. I have called the output filename SolutionInfo.cs as I like to use the same file for each project in the solution (I’ll show you how to do this soon).

Let's test this by running: build /t:solutionInfo

Output from SolutionInfo

As you can see we are using the hard-coded version number of 1.0.0.0 for the moment.

Now lets hook our SolutionInfo.cs file into our visual studio project and have it included in the build.
  1. Firstly go through your project and delete any existing AssemblyInfo files you may have under the “Properties” folder.
  2. For each project in your solution right click and select “Add Existing Item” from the context menu.
  3. Navigate to the SolutionInfo.cs file generated and add as a link. (See below on how to add as a link)
Add SolutionInfo as a link

3) Combining the Hg-Revision and SolutionInfo Tasks

So far our SolutionInfo task only uses a hard-coded revision number of  "0". What we really want is to have this revision number linked to the source control revision number. This is really easy to achieve as follows.
<Target Name="VersionSolutionInfo" DependsOnTargets="Hg-Revision;SolutionInfo">
    <Message Text="Get Revision, Generate SolutionInfo"/>
</Target>
So we have just combined the two items into a new task called VersionSolutionInfo. This task depends on the Hg-Revision and SolutionInfo tasks, so it will first call Hg-Revision to get the lastest revision number into our Revision property then when SolutionInfo is called it will use this revision number.

Lets execute it as follows: build /t:VersionSolutionInfo

Output from VersionSolutionInfo

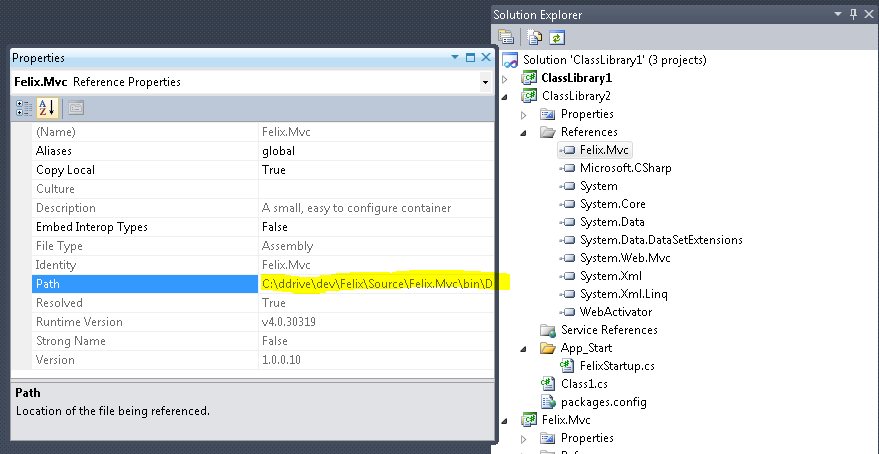
As you can see, the revision number 10 is retrieved from mercurial and then the solutionInfo is generated. If you inspect the SolutionInfo.cs file you will find that the version number is now 1.0.0.10

The final step is to change our default build task to depend on VersionSolutionInfo so we can have everything done in 1 step.
<Target Name="Build" DependsOnTargets="Clean;VersionSolutionInfo,Compile">
    <Message Text="Clean, VersionSolutionInfo, Compile"/>
</Target>
NB: you can have any number of files containing the assembly meta data such as company, version etc. For example we could split it as follows:
  • SolutionInfo.cs – contains static information and is checked into source control
  • SolutionInfo.geneated.cs – just contains version information (not checked in)
You can organise it anyway you like.

Update: You need to TAG your repository with the full version number so you can relate the release's version no to a changeset across all repositories. I'll post a build target to do the tag automatically at some point. Thanks to @jdhard for bringing this up.

Below I have provided two sample MsBuild files. Firstly we have our main build file that handles : clean & compile from the first post it this series. The second file contains the targets used in this post. I have split out the items so it's easy to isolate the Tasks for this post.

Resources:
This is the second post in the MsBuild series.

Shout it kick it on DotNetKicks.com